
-
Beautiful blocks Marilyn!
I've been piecing my blocks using my Necchi Nora from the 50's. It doesn't have a needle down position but I got used to putting the needle down when I stop sewing. Doesn't have a knee lift although the knee "thingy" can be used to operate the machine instead of the foot pedal. I have used a startie-stopie but recently I started using Bonnie Hunter's Leaders and Enders system which allows to work on 2 or more projects at a time. She just issued a new challenge, check it herehttp://quiltville.blogspot.com/2012/...challenge.html . Since I decided to use my reel blocks to make houses instead, I'm doing the 3" spools to make a border. The roofs of the houses will have the maker name and state(if from USA) or country (if from overseas). I'm planning on calling my quilt : TQS Neighborhood, the threads that connect us.
I use a good ald bamboo skewer as stiletto to hold fabric points and also as seam "undoer" (ripper). I don't like to cut the threads when un-sewing, I prefer to pull the stitches, that way I avoid the chance of ripping the fabric along with the stitch. The point in the skewer is sharp enough to pull the thread but blunt enough to not leave any marks on the fabric. :idea: :wink:
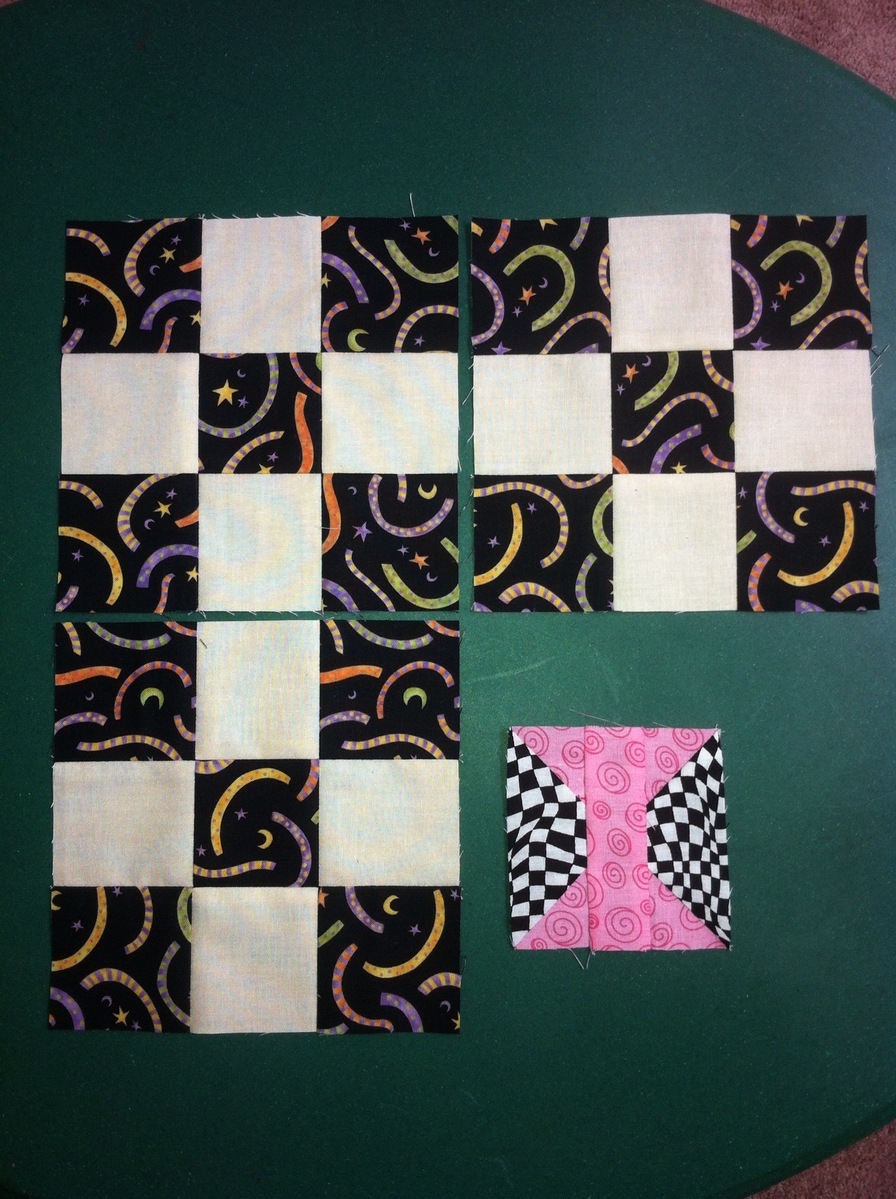
Last but not least. Still behind but here are my first 9 patch blocks. Besides working on the sampler, I'm using the leaders & enders to sew blocks (already cut) from another project that had been waiting since last year ops: :cry: ops: and some lil' spools. Ha!!! one sneaked in the photo :lol: :lol: :lol:

-
Terrie, have you tried ending your seam i.e. the end of the point from one patch on a small piece of paper about 1" x 1 1/2" and then start the point of the next patch on the same piece of paper? It needs to be the thin paper like old fashioned typing copy paper so it tears really easily without distorting the points. If you are into paper piecing then you can use scraps from that for this purpose.Originally posted by crocus999
MarianneComment
-
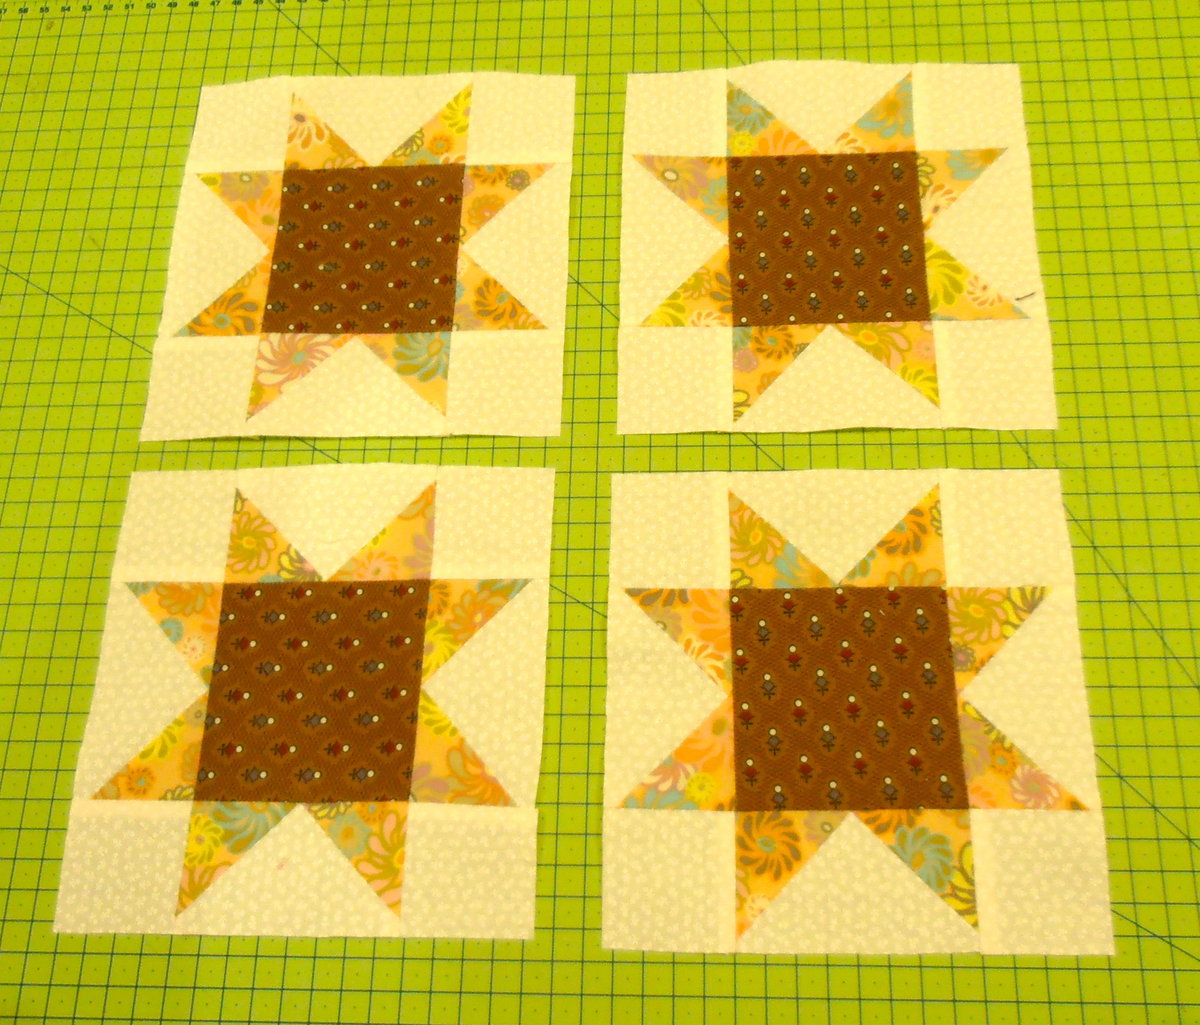
I have tried my hand at the Sawtooth Star block today. The Flying Geese units are not too bad but when I start to put the whole block together I find it gets distorted. I think I am too much of a novie yet to cope with the 2" squares in the corners No room for any mistakes and despite my best efforts and starched fabric I have 2 wonky blocks. They are almost the right size which is a step forward from the Yankee Puzzle blocks last week. I will continue to make Flying Geese units and try all the different ways to make them I have found so far but I think I will just put those units together to form blocks instead of making the stars ops:
I am also really struggling with the thick seam I get when pressing the seam allowances towards the triangles - there is a lot less bulk if I press one towards the Goose which I did by mistake on one unit. Is there a particular reason why they should both be pressed towards the triangles?
Perhaps I should try to make a 12" star block to see if I am more successful doing that. Something to think about over night :!:
Off to dream of stars :P
MarianneComment
-
Marianne...try following Annis' step-up on pg. 35 of this thread...it's great ! Be sure to square up every joining.
it gets easier !
Comment
-
Got mine done tonight. Had to redo one flying goose as I managed to cut off the 1/4" allowance at the top. I will definitely be sewing these to the sashing with a very scant 1/4" . :roll: Marianne, these are not as easy as Laura makes them look. There is a lot to look out for but especially not cutting off your points and remembering that you need that 1/4" seam allowance at the tips. Good luck.
Comment
-
Limbania & Rita - Your blocks are beautiful! I haven't started my star blocks yet, but will have them done by the end of the weekend. I'll post when they're done.
Nancy
Comment
-
Great looking blocks Rita!Comment
-
Limbania and Rita--your blocks are great! Love the fabrics and look forward to seeing how they will combine with the rest of your choices.


Comment
-
Marilyn and Rita, thank you for your input and encouragement. Annis' photos were very helpful. In the cool light of a very grey morning and a really close look at the morning I can see that it is indeed the corners that make my star blocks wonky.


I am actually pretty pleased with the Geese units which I made larger and cut down to size. Maybe I need to use stronger starch on the fabric that goes into the corner.
I know the blocks don't look like star blocks but I wanted a block that would blend more than stand out. I haven't done a design as such but have an idea in my head; time will tell if I can pull that off. It is funny, I have never liked sampler quilts – I made 2 in a class in the mid-80ties, one by hand and the other by machine, which put me off patchwork for a long time and I thought I would never do another! A couple of years ago I did some BOM and I was very, very careful of how I made them so they looked very co-ordinated. When I saw this class I really, really liked how the quilt looked and now I'm off on a tangent. You never know what happens once you start playing, do you?
MarianneComment
-
Marianne, you have taken the learning experience to a new level with all your experimentation with each block and I think that is the real value in doing this class. I applaud what you are doing, and by the way, I'm attracted to the colors of this block as well as the non-traditional shape you've given it. What you're doing and how you are documenting the experiences is inspiring!
Comment
-
Hi Marianne - I love your fabrics and how you are doing the colors! Both blocks look really good. In fact, the second one looks perfect. And the little bobble that I see in the first block will just be hidden in the seam allowance when the blocks are put together, so it doesn't matter. Good job!!
NancyComment
-
Ditto...ditto !! Everyone's blocks look great !! Can't wait to see the finished products ! Limbania...thanks for the reminder
about Quiltville and leaders and enders ! I think I'll start an new habit !!Comment
-
Marianne, your blocks look great to me. Like Nancy says, once they're sewn into the quilt they will be fine.
Comment
-
Marianne - your blocks look fine to me. I even like the way you put the corner squares in, makes a whole new block!
I will try the little paper thing you suggested. I shall begin my star blocks today. Just have to go through my stash, as I hadn't pre-chosen the colours, just decided to use the stash. (although I bought other fabric, just in case) And, I keep rearranging the position of the blocks on the design wall. I hope I don't run out of background!Comment
-
Thank you everybody! You are all so encouraging. I will go and cut more pieces for star blocks :wink: I have made up a stronger starch so the corners can behave like the rest; I think I got the recipe wrong for the second batch of starch I made and used on the darker fabric in the blocks.
Terrie, fingers crossed that the background fabric will "stretch" and suffice. I am using a fat quarter selection from years ago and adding some random solids left over from blouses and nighties I made a couple of years ago.
MarianneComment
-

-
-
-
-
-
-
-
-
-
-
-
-
-
-
-
-
-


What's Going On
There are currently 3619 users online. 557 members and 3062 guests.
Most users ever online was 45,077 at 12:30 PM on 02-01-2026.
Working...
Comment