
-
I know, it's VERY HOT! however, it's the time of year when the kids are not in school.Originally posted by ritzy
Andrée -
X MARKS THE BLOCK
Block size: 3” x 3”
Cutting instructions:
#12: 8 squares 7/8” x 7/8”
4 squares 1” x 1”
Background: 4 squares 1-5/8” x 1-5/8”
#9: 4 strips 1” x 2-3/4”
Letter: Press fusible web to the back of a 3/4” x 4” strip. Cut the strip in half along the lenght to make 2 strips of 3/8” x 4”.
Step 1: as per instructions, using the 7/8” squares on opposite corners.
Step 2: as per instructions.
Step 3: When I join the rows, i pressed the seam allowance in opposite directions, to get a mini-4-patch in the center.
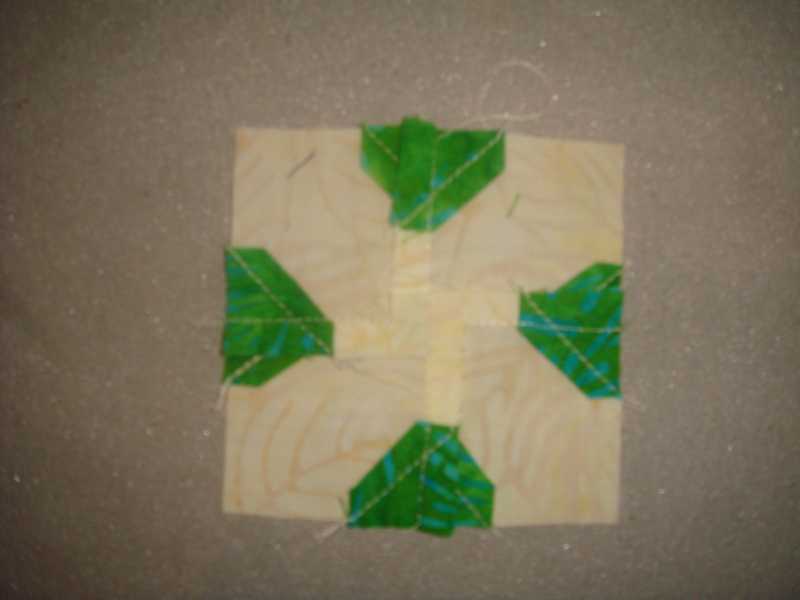
This unit measures 2-3/4” x 2-3/4”.
Steps 4-5-6: as per instructions.
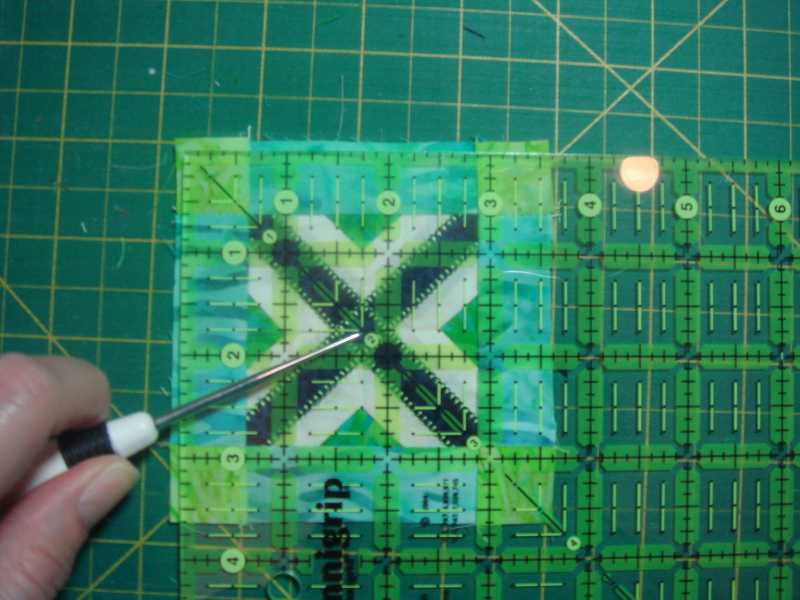
Step 7: Trim the block to 3-1/2” square (3” x 3” finished), making sure the 1-3/4” mark is in the center.
Comment
-
UNION SQUARE
Panel size: 4-1/2” x 3”
Block size: 3” x 3”
I decided to paper-piece this one, much easier than try to figure the exact measurements for the center (in 16th? not sure)
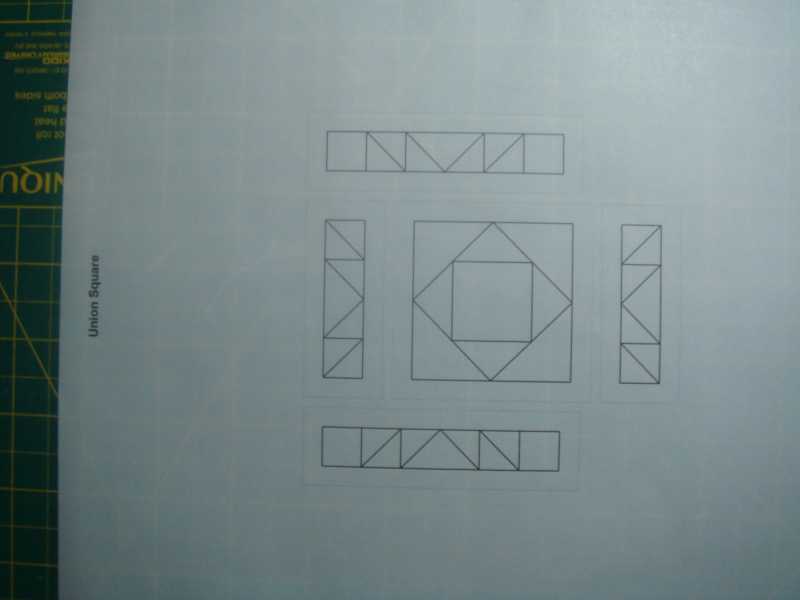
For those who wish to receive the PDF, please email me. If you wish to draw this on graph paper, the finish size is 3” x 3”, and the “border” of HST is 1/2” finished. That leaves the center squares to be 2” (outer), and then, drawing a line from each center (middle inner), and then the center square, which should be 1”.
Cutting instructions (for paper-piecing, so a little bigger than required):
Center square: 1 square 1-1/2” x 1-1/2”
2nd row (#9) : 2 squares 2”x 2” cut in half diagonally
3rd row (#5): 2 squares 3” x 3” cut in half diagonally
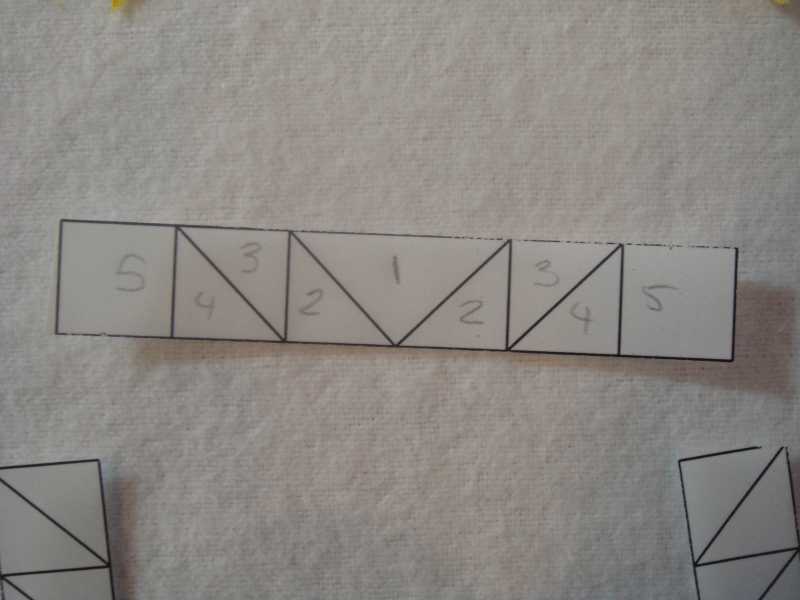
For the “rays” border (it looks like a sun) that I paper-pieced as well, I also cut everything bigger, and I trimmed to the correct size once every unit was completed
#15: 8 squares 2” x 2” cut in half diagonally
#15: 4 rectangles 1-1/2” x 2” (for the “Flying geese” part)
4 squares 2” x 2” cut in half diagonally (for the HST part)
4 squares 1-1/2” x 1-1/2” (for the corners)
BACKGROUND: 2” x 3-1/2” (this one is accurate!)
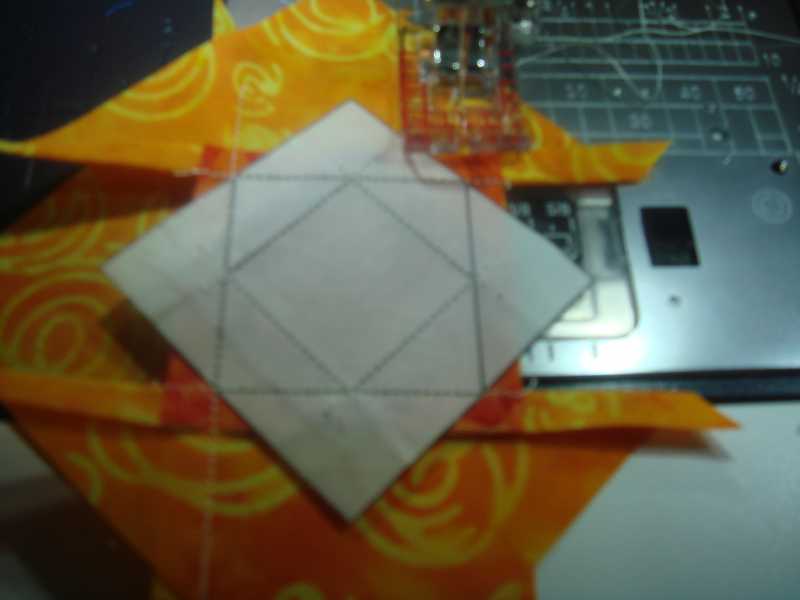
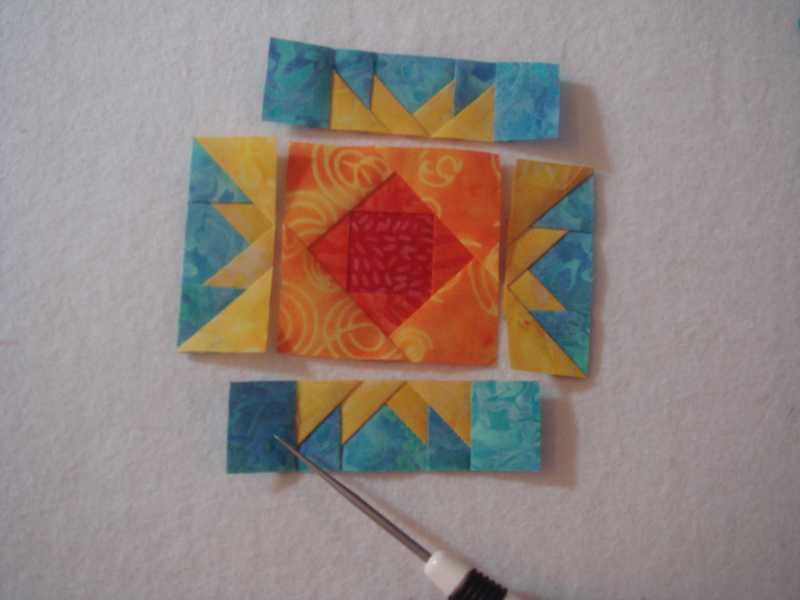
Step 1: Make the squares-in-a-square unit. This photo shows how “oversized” the unit is, which will be trimmed to 2-1/2” x 2-1/2”.
Step 2: Each border is pieced from the center out.
Comment
-
This will ensure that the seam allowances “nest”: When the small border unit is sewn to the sides of the Square unit, press the seam towards the square unit. Then sew the longer border.
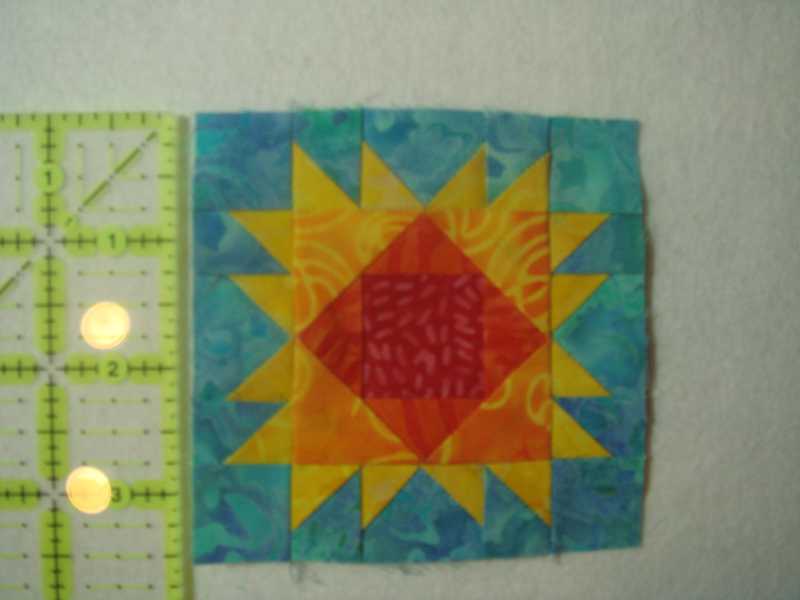
The block measures 3-1/2” x 3-1/2” from raw edge to raw edge.
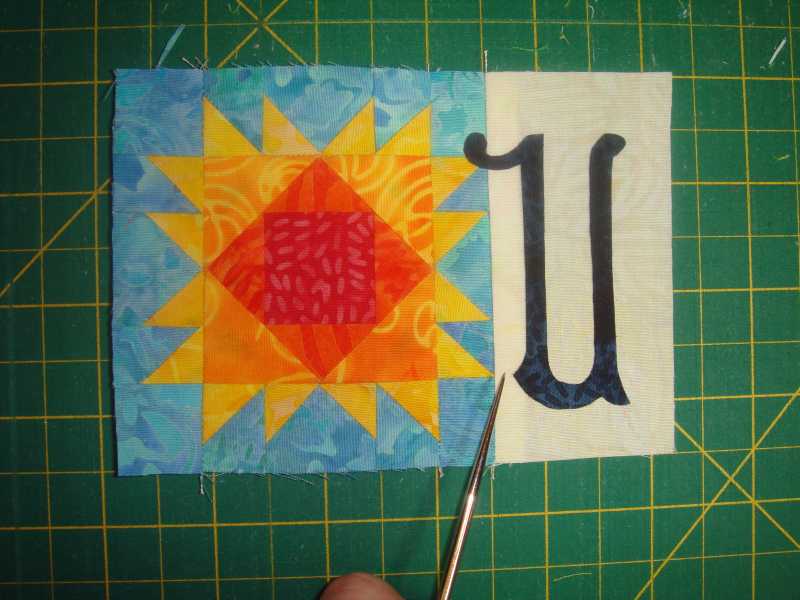
Then, sew the background to the right side of the block.
I aligned the bottom tip of the “U” with the bottom HST, and the left side of the “U” at 5/16” from the seam (between 1/4” and 3/8”).
Comment
-
WINDMILL
Panel size: 5” x 3”
Block size 3” x 3”
This one can be paper-pieced as well, in 2 sections.
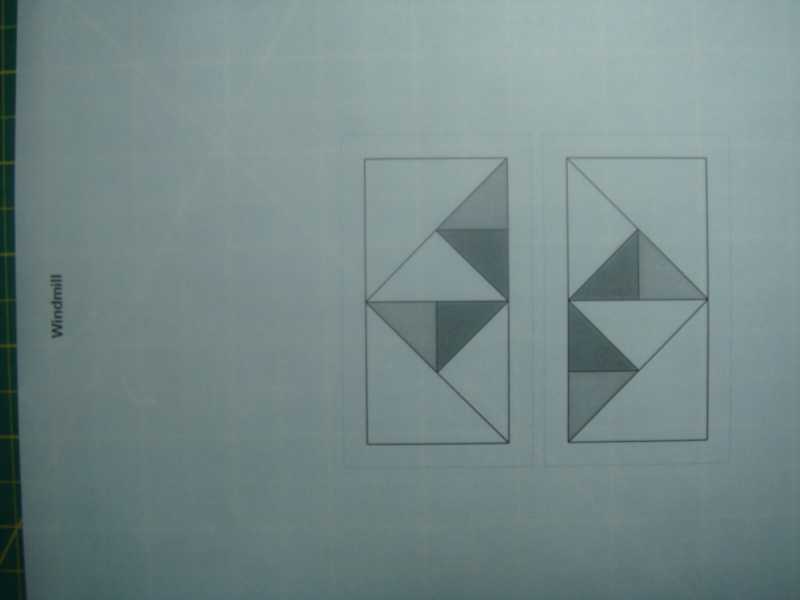
Cutting instructions: (oversized for paper-piecing)
#11: 2 squares 1-3/4” x 1-3/4” cut in half diagonally
#13: 2 squares 1-3/4” x 1-3/4” cut in half diagonally
#17: 2 squares 2” x 2”cut in half diagonally
BACKGROUND: 2 squares 2-1/2” x 2-1/2” cut in half diagonally
1 rectangle 2-1/2” x 3-1/2” (this one is accurate)
Each unit is sewn in this order, from the bottom left : color #17, color #13, color #11, background, #17, #13, #11, background.
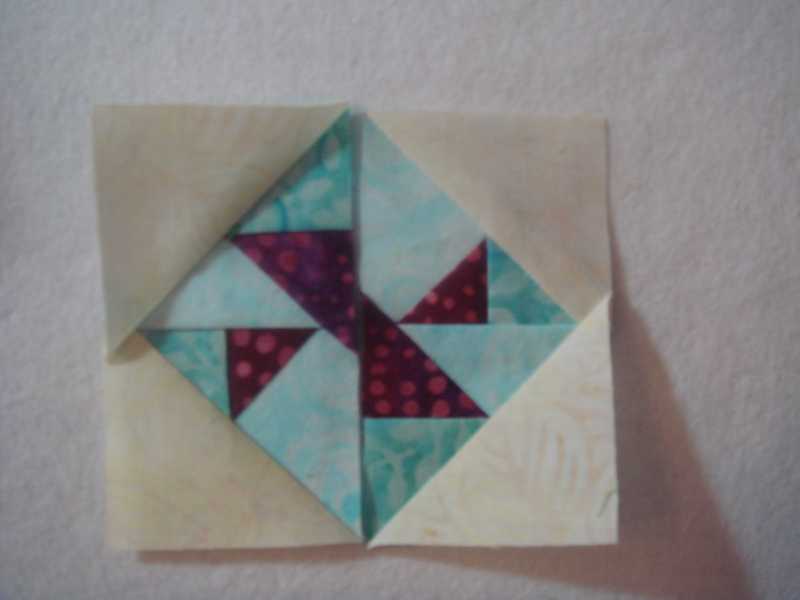
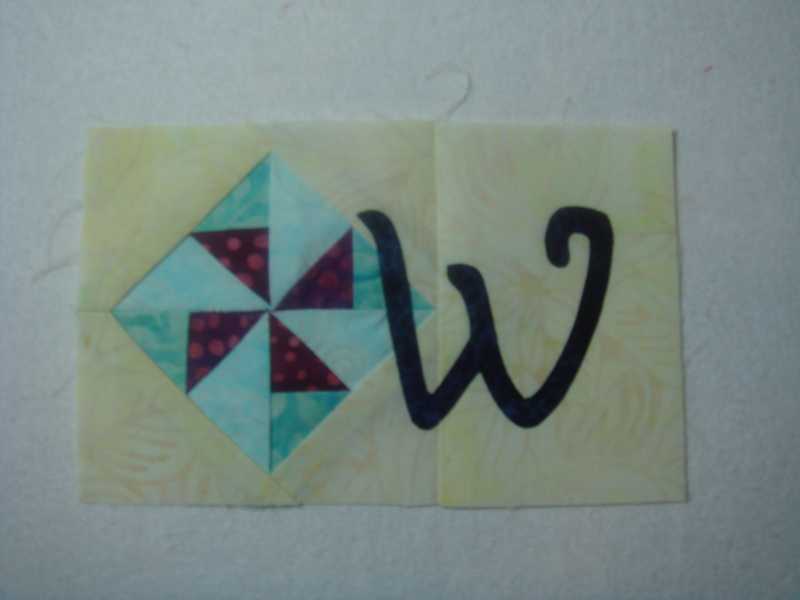
Sew the 2 units together, the block measures 3-1/2” x 3-1/2”. Sew the background rectangle to the right of the block. Fuse the “W” in place, with margins of 3/4” at the top and bottom.
Comment
-
Andrée, YOU ROCK!


It's Not What You Gather, But What You Scatter
That Tells What Kind Of Life You Have Lived !Comment
-
Thanks Margo!Comment
-
Andreee that is amazing! I always look forward to see how you do these half size blocks. Now I wish I would have done half size. I still might! Would love the PDF.Comment
-
Andree your work is perfect! I can't tell you how much I look forward to your BOM posts they are fascinating. I was serious when I asked if you could do a TQS classroom.
Best Wishes Pam in ScotlandComment
-
Sign me up for the class! JanComment
-
I do not have July quilted all the way yet--the reason--I think there is too much green in the group. I am considering changing the color of the "Q". I think that would help a lot. I am dreading the rip out and the remaking of the "Q".
August blocks are made and put together but after ripping out every seam, at least once, I decided to stop.

Comment
-
I'm laughing, Ritzy. The seam-ripper has become my true friend, but at least the final seams are close to accurate. You are not alone!
I just re-worked the T block and re-assembled July. Oops, yours is half-sized, right? Funny how we can't tell from the pictures!
Comment
-
Beautiful work Ritzy! I love the colors as they are...
AndréeComment
-

-
-
-
-
-
-
-
-
-
-
-
-
-
-
-


What's Going On
There are currently 4523 users online. 215 members and 4308 guests.
Most users ever online was 45,077 at 12:30 PM on 02-01-2026.
Working...
Comment