
-
Yep -- it's all layers. I borrowed the TQS star from the website and just did a bunch of different layers with different levels of opaqueness. (Wow -- spelled that right the first time around!) If you go to YouTube and search for "Photoshop forum signature" you should find a bunch of tutorials. The "Worlds of Warcraft" people do some really cool ones and have tutorials all over the place. Good luck!Originally posted by Margo
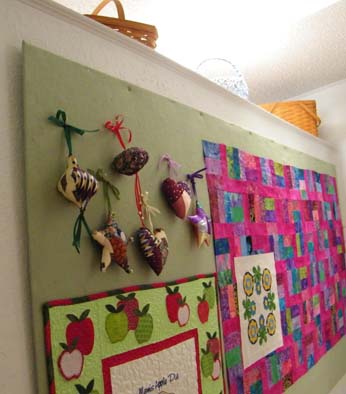
And what a fun topic this is! I love peeking in everyone's quilting spaces!
It's Not What You Gather, But What You Scatter
That Tells What Kind Of Life You Have Lived ! -
Thanks! I'm off to Googleland so you don't have to hold my hand through this!! :lol:
It's Not What You Gather, But What You Scatter
That Tells What Kind Of Life You Have Lived !Comment
-
OK, I have another version of a design wall that works really great for the space that I have. I have a quilting studio in my garage that houses my quilting frame setup and my commercial embroidery machine and a few other miscellany items. There is no design wall out there, nor is there a place for one. In the house I have my sewing room, which is where I do my actual sewing and cutting and pressing and whatever else I can fit in there. It is a small room considering everything I have that needs to be in there. The only available wall that I have is the hallway. It is actually pretty bright as there is a skylight above it. I have two doorways that I can stand back for a perspective view. When I wanted to figure out how I was going to do a design wall, my husband suggested the white corrugated plastic board that is used for signs. I covered the board with flannel using a spray adhesive, and that includes adhering the edges on the backside. The piece of plastic is 4' x 8' and he used a piece of wood molding that was 7' long and attached it on the top/back by using a couple screws from the front side, and a couple staples in between the screws. He only put two screws about 4 feet apart on the wall that had a large head and left them about 1/4" sticking out so the molding lip sits on top of the screws and it won't slip off. I needed a larger surface back a few months ago and I made an extension that I put a hinge on that I can slip under the bottom edge of the design wall and it sits on the floor. When I was done with the project I just folded up the extension and I'm back to my 4x8 wall.
The nice thing about the corrugated plastic board is it is light, absolutely no mess, and it can be portable if you don't want to hang it.
I am not typically computer challenged... but I do not see how to add the images here, so I just may go over to my blog and create an entry there that would include pictures.
It's Not What You Gather, But What You Scatter
That Tells What Kind Of Life You Have Lived !Comment
-
About the photos, Sallie.Originally posted by SalApril
After you fill in your text box scroll down a little and you will see two tabs. One says "Options" and the other says "Upload Attachment". Click on the upload attachment tab, then click on "Choose File" in order to select your photo from your files. Click "OPEN" on your photo file then click "Add the file" on the tab.
Your uploaded file will appear between the text box and the tabs.
Place your cursor where you want the photo to appear in the text box and click on "Place inline"

You can click "Preview" to make sure it's like you want it to be viewed, then click "Submit"
Voila!!
It's Not What You Gather, But What You Scatter
That Tells What Kind Of Life You Have Lived !Comment
-
I did go over to my blog and posted images with my description of the design wall that I have.
 I went through all the steps you described here before, all but the last one... so this is a quick picture to verify that I can post an image here. Should have known, I have worked with html before.
Thank you Margo.
It's Not What You Gather, But What You Scatter
That Tells What Kind Of Life You Have Lived !Comment
-

It's Not What You Gather, But What You Scatter
That Tells What Kind Of Life You Have Lived !Comment
-
Lorchen, I love your studio, it looks comfy and creativeOriginally posted by Lorchen My DH frequently mentions the mess in my jam-packed sewing room, but everyone who comes to visit winds up pulling in a chair to sit and chat in my studio, cramped tho it is, and mentions how much they like it. People who are creative are usually inspired by having scraps and UFOs and fabrics and patterns and ideas tacked to a bulletin board. However, those who are neatniks are put off. I prefer to have creative visitors :lol:
And I just love that German beach chair -- I could easily while away an afternoon, gabbing and browsing quilt magazines and books 8)
It's Not What You Gather, But What You Scatter
That Tells What Kind Of Life You Have Lived !Comment
-
I wish I had known to wrap each piece of insulation before attaching it to the wall when I created mine 10 years ago. My DH put the insulation up on the entire wall & then we put up a huge sheet of batting to cover it. It works really well but I now have some saggy bits because the Warm & Natural that I affixed with 505 is now coming loose. Any ideas how to fix the problem?

Comment
-
If parts of it have come loose, maybe you could just peel it all back and re-apply the 505?
It's Not What You Gather, But What You Scatter
That Tells What Kind Of Life You Have Lived !Comment
-
Thanks Margo. I keep doing that if I can get to the loose parts but my real challenge- it now has developed wrinkles in the middle section. I think I may eventually try to take it all down & try grey flannel which you suggested before. The W&N does not owe me anything at this point.Comment
-
In the meantime, try to shrink back that cotton batting in the middle with a good burst of steam from your iron!! Even better if you have a steamer!
It's Not What You Gather, But What You Scatter
That Tells What Kind Of Life You Have Lived !Comment
-
You are a genious. How do you have time to quilt? Your pearls of wisdom are terrific. By the way, I loved your BOM quilt.
Comment
-
Thanks, Bunny. I need to get a life!!

It's Not What You Gather, But What You Scatter
That Tells What Kind Of Life You Have Lived !Comment
-
The fun in making your own design wall is the many options you have. For instance, a traveling size can be as simple as blue painters tape and a yard of flannel (tap the flannel on a classroom wall). Or if a wall isn't available, a bi-fold poster display board (often sold at Michaels craft store -under $6.00 or at an office supply store) cover with flannel with duck tape on the back (I purchased the poster display board and cut it to make it fold accordion style covered with two layers of white flannel). For home if you have a small sewing area, try hanging two over the door wreath holders on a door or better yet the closet doors, the hang on it a long dowel with your flannel fabric (or even the back side of a flannel backed table cloth) draping down (for this you may have to use safety pins for your fabrics or painters tape to hold them up.
Well thats a few ideas, just remember be as creative with what you have as you do with your quilting and have fun with it.
It's Not What You Gather, But What You Scatter
That Tells What Kind Of Life You Have Lived !Comment
-
Bunny, the problem may be that you used 505. It's a temporary repositionable adhesive. The company also makes 404, which is a permanent repositionable adhesive.Originally posted by bunny9
I used 404 to attached gridded flannel to donacona insulation screwed onto my sliding oak doors. When I realized that the cat thought it was a giant scratching post, I used a warm, dry iron to press the claw marks out of the fabric and stick it back down. Then I tacked clear vinyl over the bottom three feet of the design wall, to persuade Jazzy that it wasn't hers. Five years later, it's as good as ever.

in Vancouver, CanadaComment
-

-
-
-
-
-
-
-
-
-
-
-
-
-
-
-
-


What's Going On
There are currently 11875 users online. 241 members and 11634 guests.
Most users ever online was 45,077 at 12:30 PM on 02-01-2026.
Working...
Comment