Seam Allowance
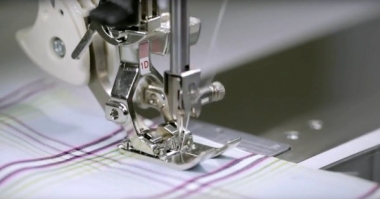
Mastering your 1/4 inch Seam Allowance consistently is one of the most important skills a quilter can have. An inaccurate seam allowance will make matching seams and points more challenging. Too big or too small seam allowances can multiply across a quilt, affecting not only the size of the blocks, but whether your quilt is square and whether or not rows will match up. It is not uncommon for even veteran quilters to measure their seam allowances and test for an accurate seam. Most sewing machines designed for Quilters will have built in marks for a perfect 1/4 inch on the throat plate and the presser foot. Pinning is also important. Be sure to pin across the seam line to ensure the fabric stays in place while sewing. Over the years we have also seen the importance of the thread used to make the seams. As thread for piecing has become stronger and thinner, you might need to make adjustments. Your pattern might also reference a scant 1/4" seam allowance to allow for variances in thread size, cutting and measuring. Testing your seam allowance for the thread and fabric is always a good idea!
Benefits of a Seam Allowance
- An accurate Seam Allowance makes matching seams and making your points easy.
- Ensures quilt blocks measure the correct size.
- Ensures quilts are square and lay flat.
Tools and Supplies for Seam Allowance
- 1/4" Seam Allowance presser foot, also known as Patchwork presser foot.
- 1/4" seam tool - a small clear plastic ruler with a hole at 1/4" your machine needle goes through. The edge of the tool is where your fabric should be for an accurate 1/4" seam.
- Seam Guide that is on the presser foot or attached to the throat plate of the sewing machine.
- An Iron with the setting for your fabric that will enable you to press seams without any fabric overlap on the front.
- Clear Ruler with 1/4" marked for testing the seam and large enough to test the size of the unfinished and finished block.
- Pins and thread for piecing the fabric you are using.
What I Wish I Knew When I Started using a Seam Allowance
If you don't have a patchwork foot or seam guide, a stack of sticky notes or tape 1/4 inch from the needle makes a great seam guide.
To test your SEAM ALLOWANCE - use 2 strips of fabric accurately cut 1 1/4" wide and 6 inches long. Place right sides together; stitch, open and press. If your finished piece does not measure 2" make adjustments accordingly until it does measure 2".
Here is a news flash for you! What DOES matter is the size of the front of your pieces after they are pressed! In order to have accurate quilt blocks, you must measure accurately, cut accurately, pin accurately, stitch accurately, and press accurately. Whatever seam allowance that consistently gives you the desired finished size is what you need to use!


